


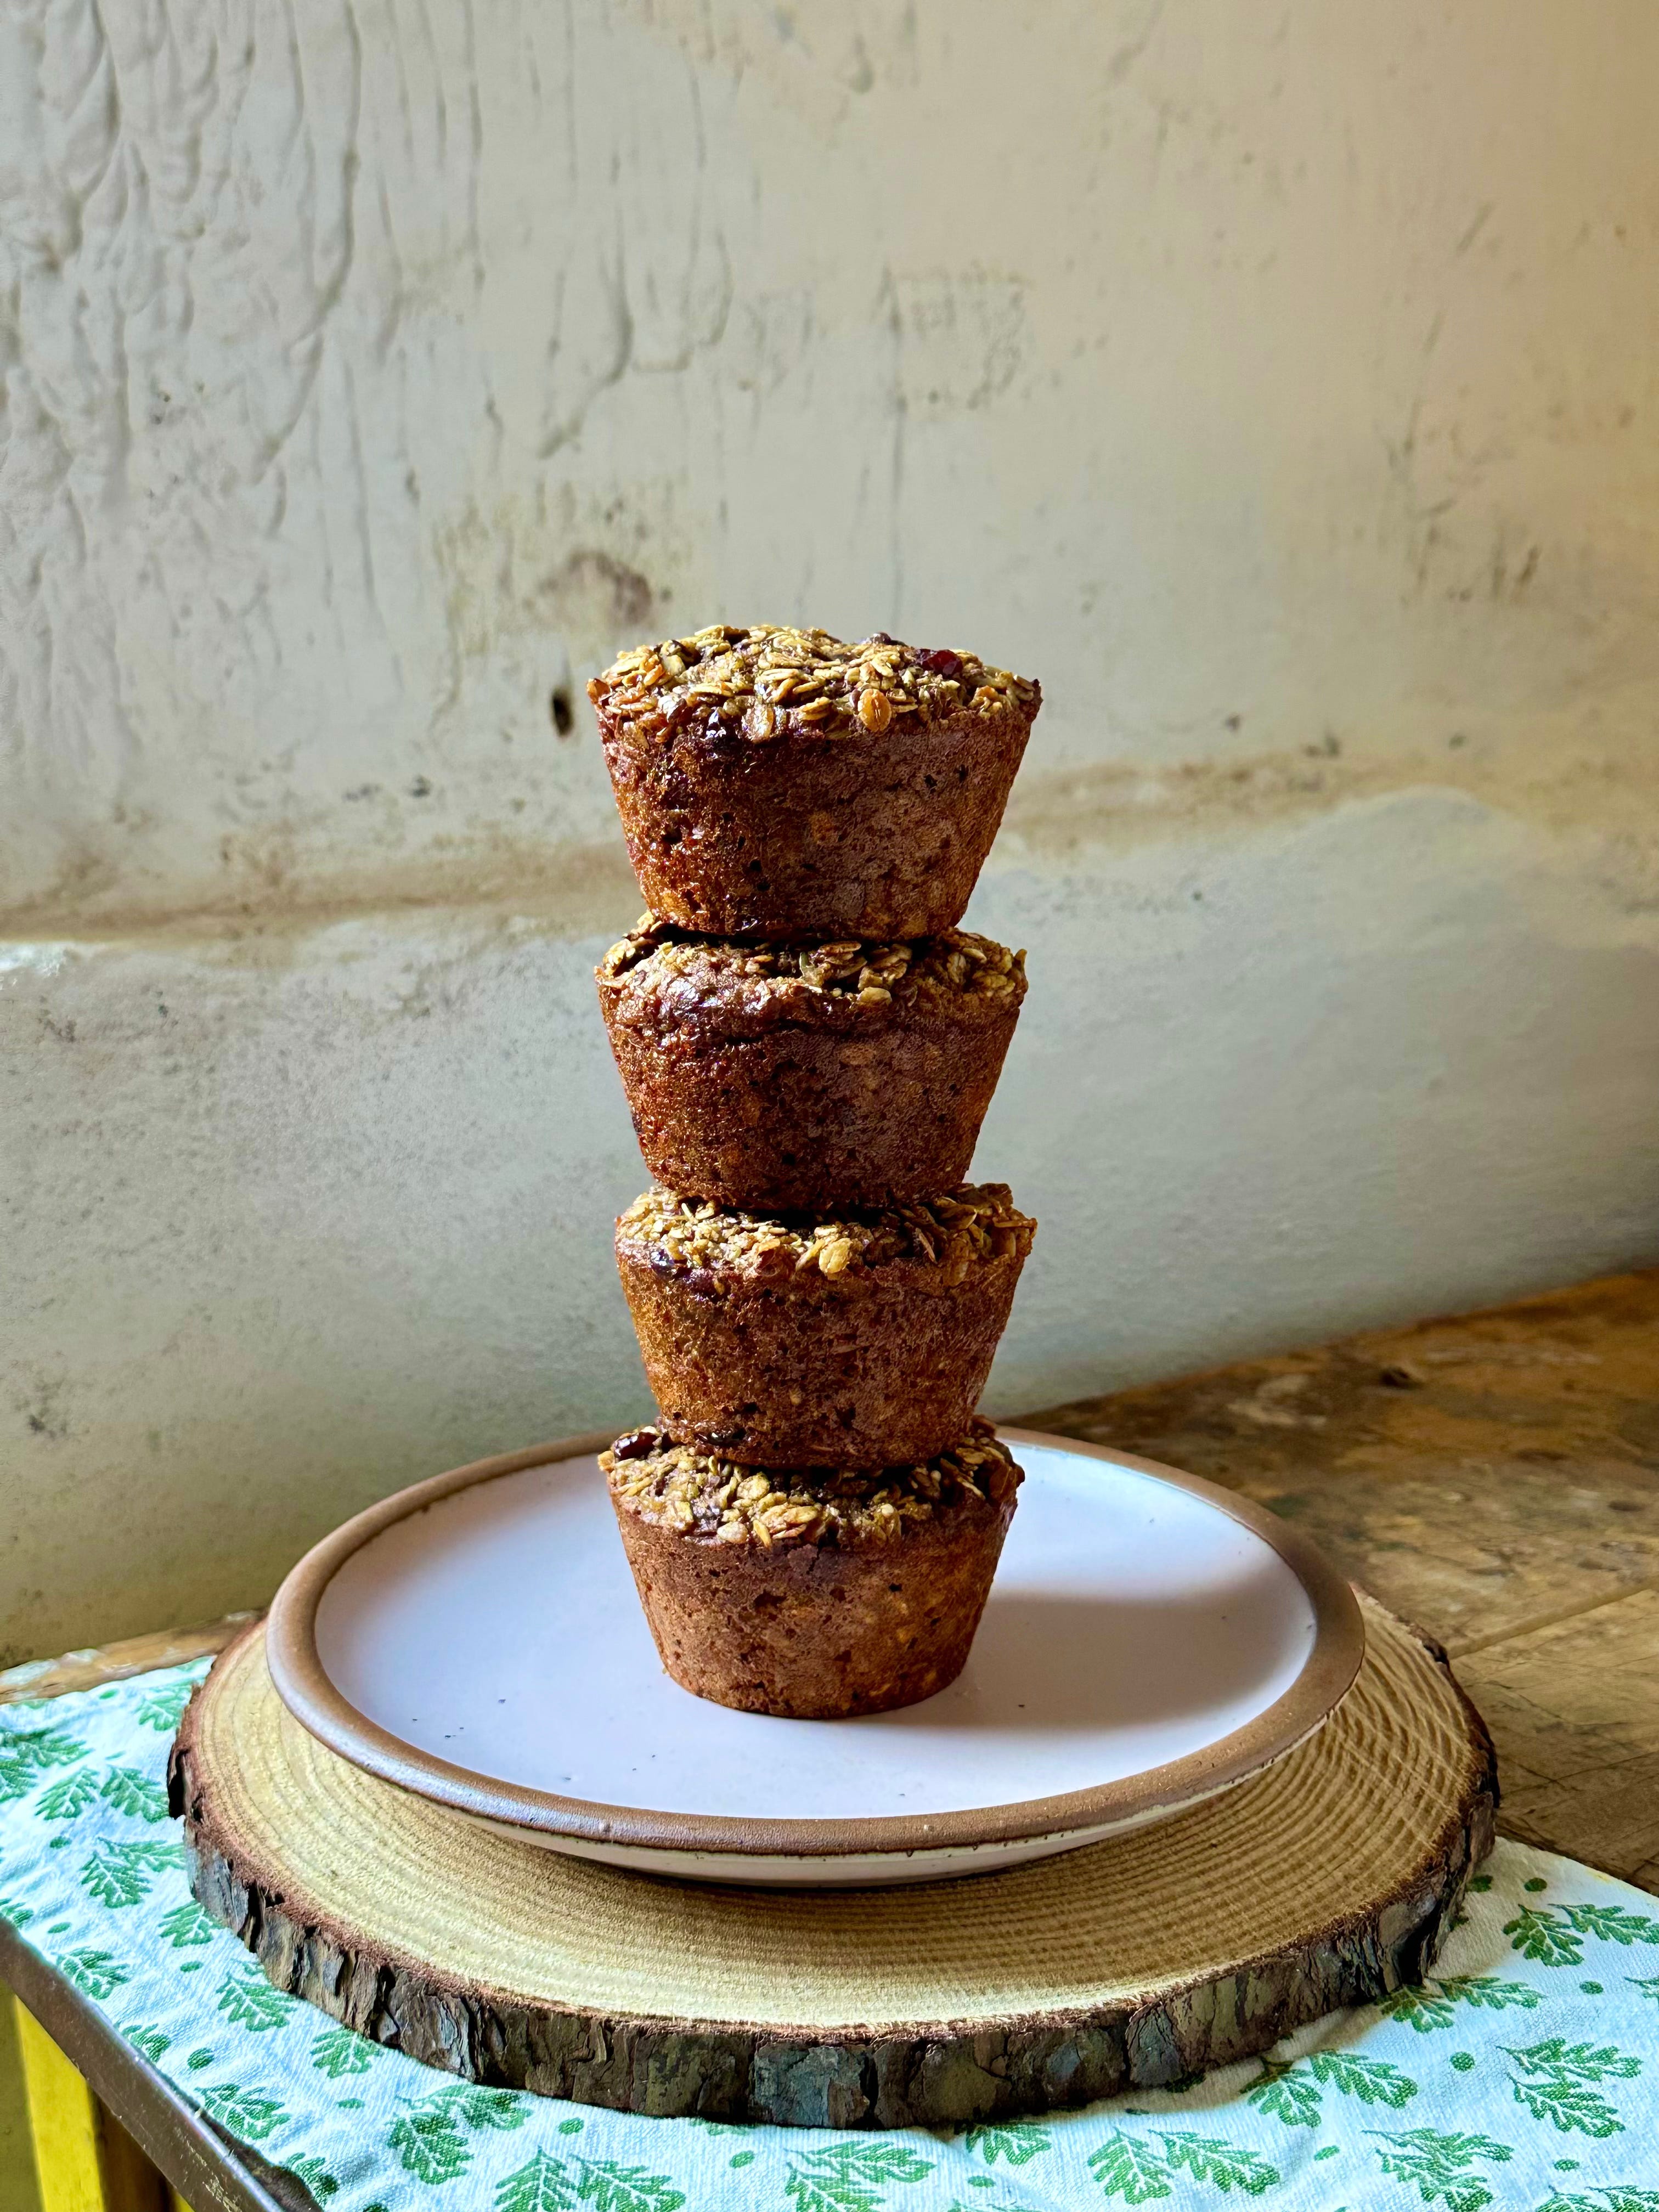
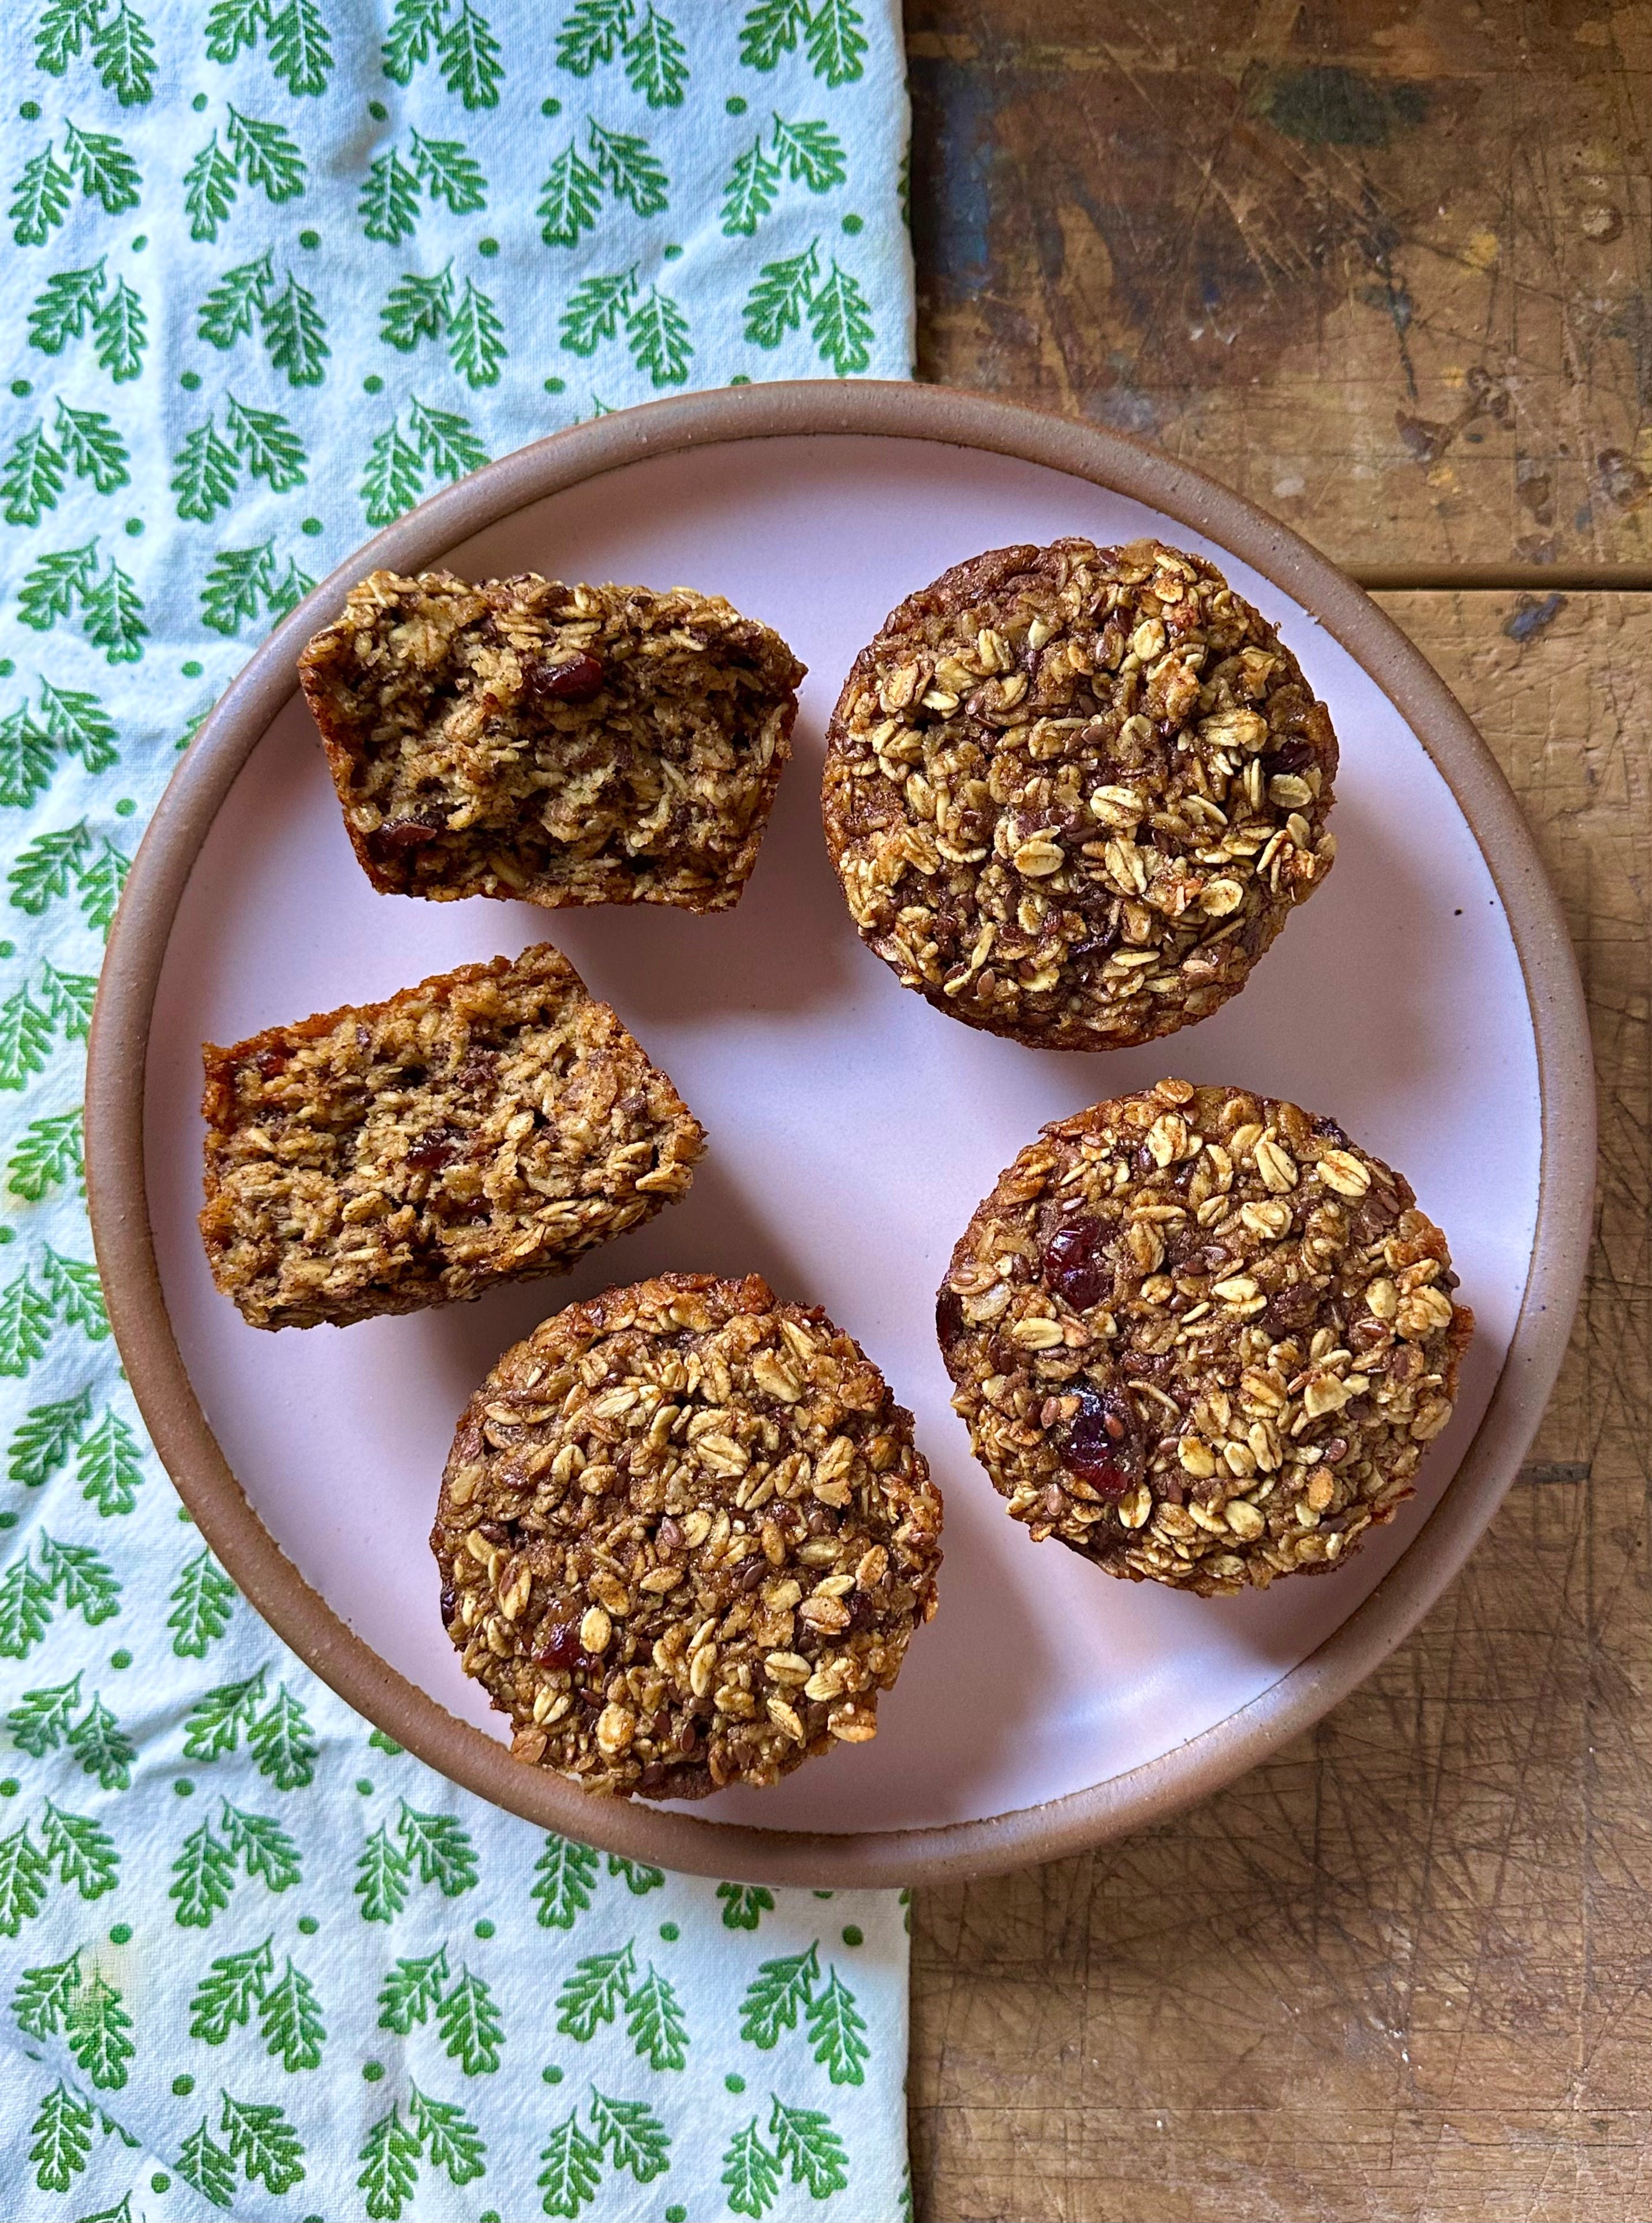
Apple Cranberry Baked Oatmeal Muffins
Like a bowl of oatmeal but far easier to carry - plus a rundown of some of my most used kitchen tools.

Hi friends!
I thought I’d share some hopefully helpful tools with you today alongside a recipe for jumbo (or standard) baked oatmeal muffins. These muffins have been great for make ahead breakfasts that last the week. Easy to make (one bowl!) and easy to grab when you’re running out the door. I hope you enjoy them as much as I have!
These are some of the kitchen tools that I reach for almost daily. Practical and affordable staples whose durability and accountability I trust again and again. You don’t need super fancy tools to make great bakes but it is worth seeking out solid options so you won’t need to constantly buy replacements or dread using what you have.
I’ve found that most of the newfangled colorful gadgets advertised on the likes of Instagram can be let downs when you actually try to use them in the kitchen. Stick to the classics and try to buy best, once. Remember that tools don’t replace our hands, they’re there to amplify the abilities and visions we already have.
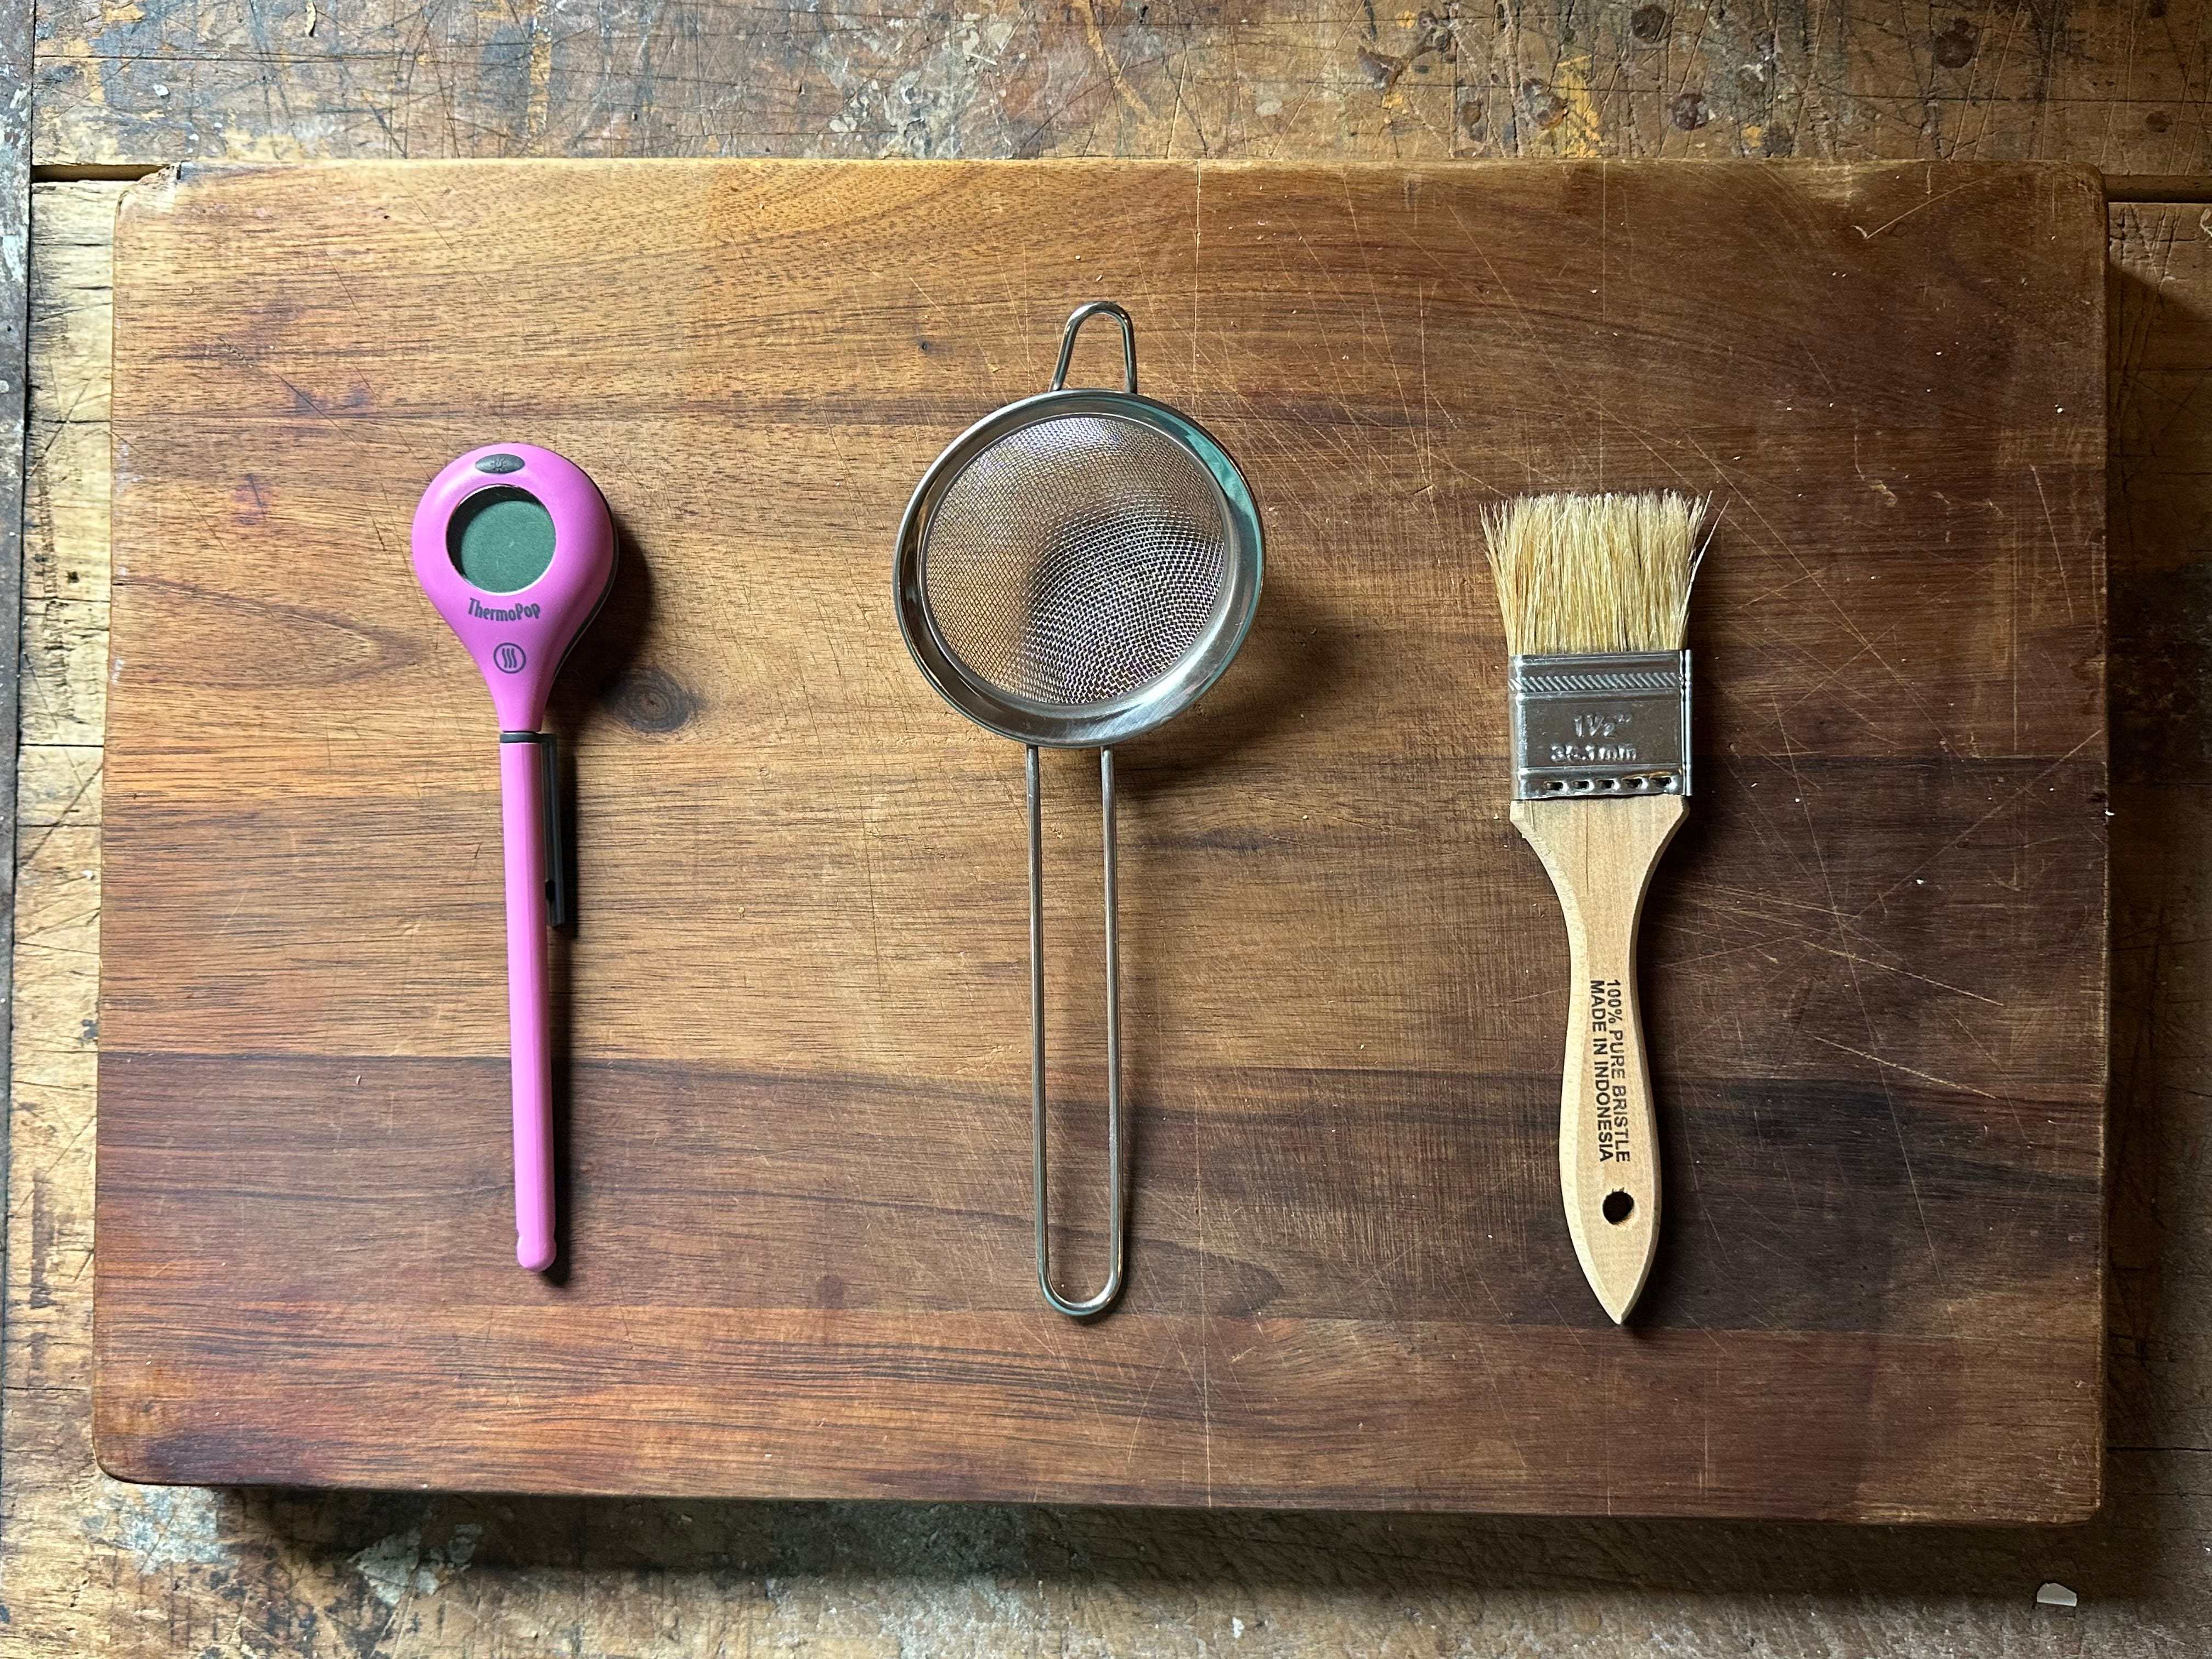
Probe thermometer (ThermoPop from ThermoWorks) - The first bakery I worked in once I moved to San Francisco had just three communal probe thermometers. I’ll never forget the endless searching that would begin if even one of them disappeared from their resting spot atop our speed rack. Usually someone had accidentally slipped one into their apron pocket or at worst a thermometer would occasionally meet its demise inside the chaotic bowl of a stand mixer or a bubbling pot of pastry cream. :(
Knowing the temperature of a sugar syrup or the internal temp of a cake just pulled from the oven are reasons enough to invest in one of these but you’ll soon find many non-pastry applications as well - dialing in the temp of water for mixing bread or ensuring that meat is properly cooked to a safe temperature are also vital uses!
Fine mesh sieve - You may already own a larger version of this very important tool but I don’t think I could get by without this trusty near-pocket sized sieve. Unless you’re making a finely textured cake (like chiffon) the need to sift all of the flour called for in a given recipe has largely been eliminated thanks to the quality and consistency of contemporary flour offerings. But! I always sift my baking soda and baking powder. I’ve found that baking soda can be especially lumpy and it’s such a critical ingredient that if it’s not spread throughout a batter, you risk a failed bake.
I also love to use my sieve to quickly turn freeze dried berries into a fine powder simply by pushing or grating the fruit against the interior of the mesh. It creates a fine snow of colorful fruit for a pop of bright garnish and looks particularly stunning when applied on top of powdered sugar which can also be sifted through the same tool.
Natural hair brush - I’ve noticed in the apartments of many of my friend’s that if they have a brush in their kitchen it’s almost always made of silicone. Somehow in the last ten years or so silicone has invaded and spread through our kitchens in so many unnecessary ways. I stand by the silicone spatula but I struggle to think of any reason to own collapsible silicone bakeware, measuring cups, or silicone coated whisks. If you must use a silicone brush, save it for basting meat or applying barbecue sauce grill-side.
For all other applications, especially pastry, a natural hair brush will serve you much better. It holds oil, melted butter, and egg wash like a pro without deforming or leaving brush marks on fragile doughs or crusts. A dry natural brush is also perfect for removing unwanted dusted flour from doughs, biscuits, scones, your work bench, etc. Wash with warm soapy water after every use and blot dry with a tower or shake the water from the bristles to keep the brush as dry as possible for storage.
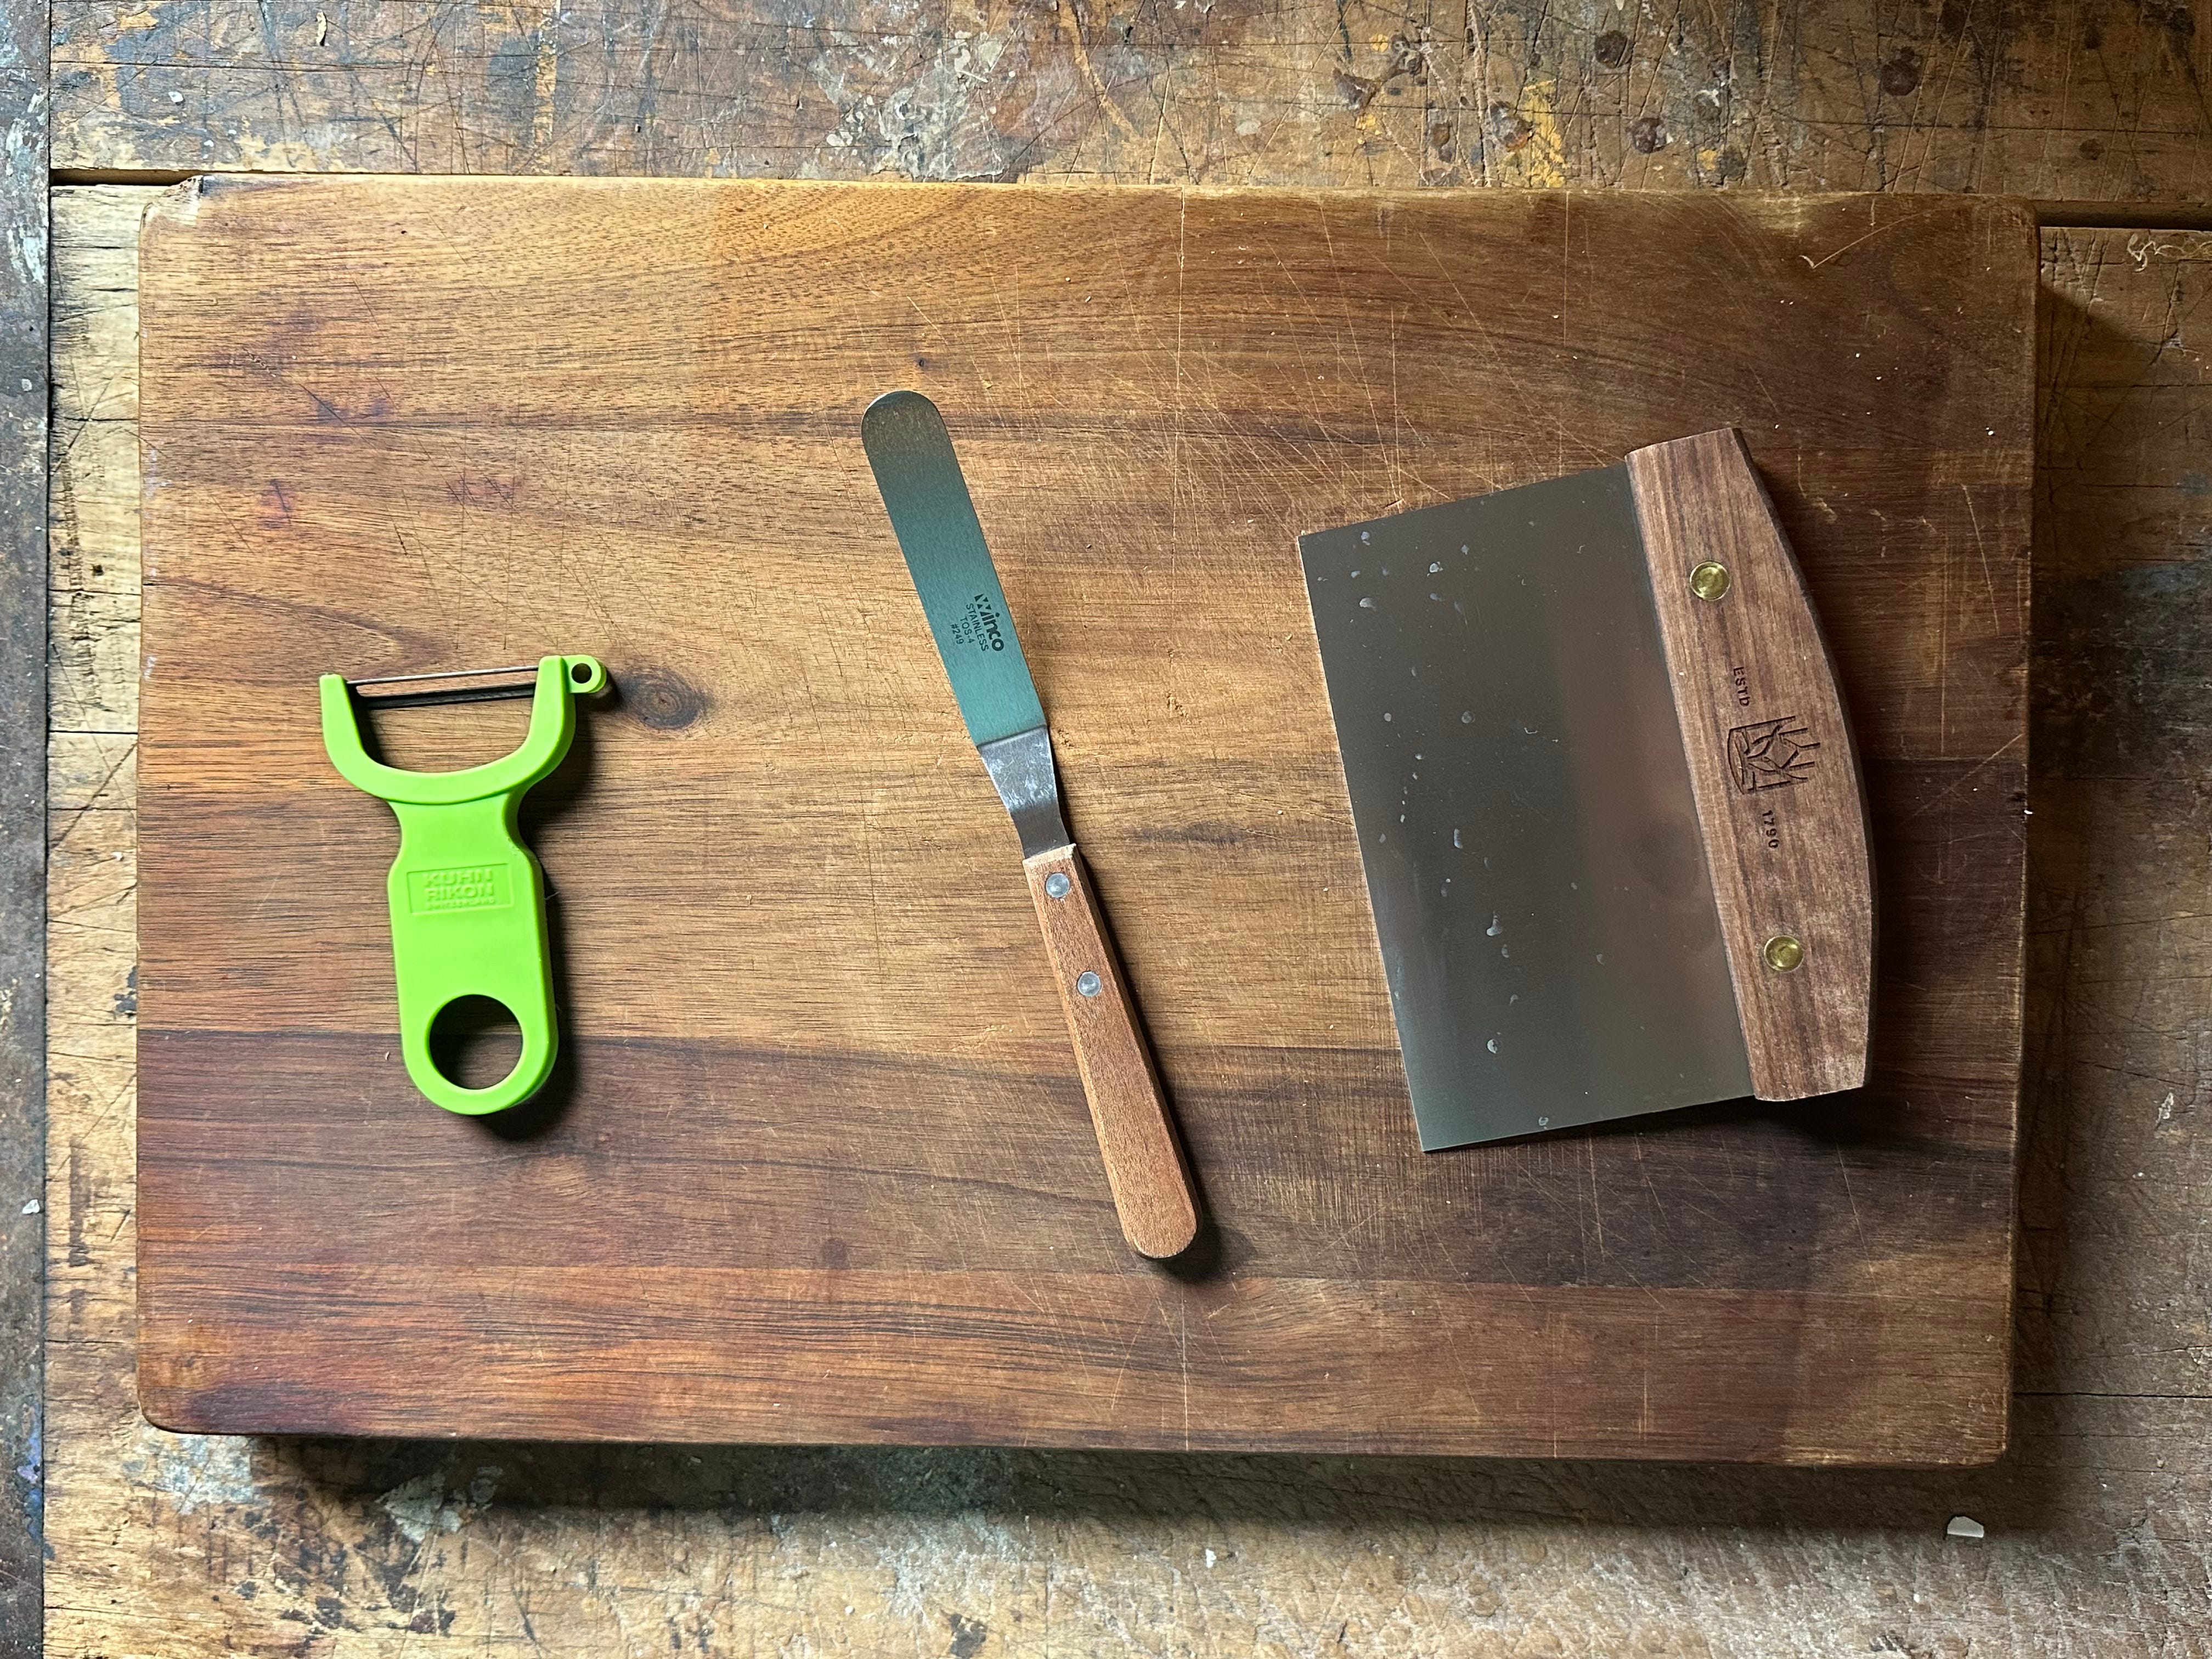
Y-Peeler (Swiss Peeler from Kuhn Rikon) - I’ve owned this peeler and have used it quite regularly for over 5 years now. It’s still super sharp and removes the peels of apples, citrus, or even hard winter squash without hesitation. It’s easy to hold and even easier to clean. Sometimes I use this peeler to peel three or four carrots completely through to make a big carrot salad dressed in sesame oil and honey with a splash of rice vinegar. The peeler makes quick work of it and is actually fun to use. In case you’re curious, the small loop on the right of the blade is for gouging out the blemishes found on things like potatoes.
Offset spatula - This tool makes it on to almost every kitchen-must-have list and for good reason. Lifting cookies, spreading buttercream, stirring a small pot of jam, even flipping fish or tofu in a sizzling skillet - this tool is like an extra heatproof hand in the kitchen. You can find many sizes of offset spatulas at baking supply stores but this is the standard and where most people start before obsessively collecting smaller or larger versions for niche kitchen tasks.
Bench scraper - Even if you never bake a loaf of rustic sourdough, this tool has hundreds of uses in the kitchen. Lifting cookies, perfecting the sides of a frosted cake, scooping chopped ingredients from a cutting board, turning a stick of butter into perfectly cubed chunks, and the list goes on! These are also handy for scraping your work surface free of spills or dried crumbs and are just what you need when it comes time to hack away at baked-on food from sheet trays after a soak in the sink.
Carpenter’s square - One of my carryover tools from art school. I prefer a rigid ruler when measuring rolled out pie dough or sheet cakes that i’m about to divide rather than a floppy tape measurer. The beauty of this tool is that it can also help you create a right (90°) angle quickly and accurately. If held on its side, it can also help you check that a layered cake isn’t tilting out of alignment. My only complaint is that I wish mine was longer in length. Having 18 to 24 inches (45cm to 60cm) would be more useful and would remove the need to lift and adjust the ruler so often.
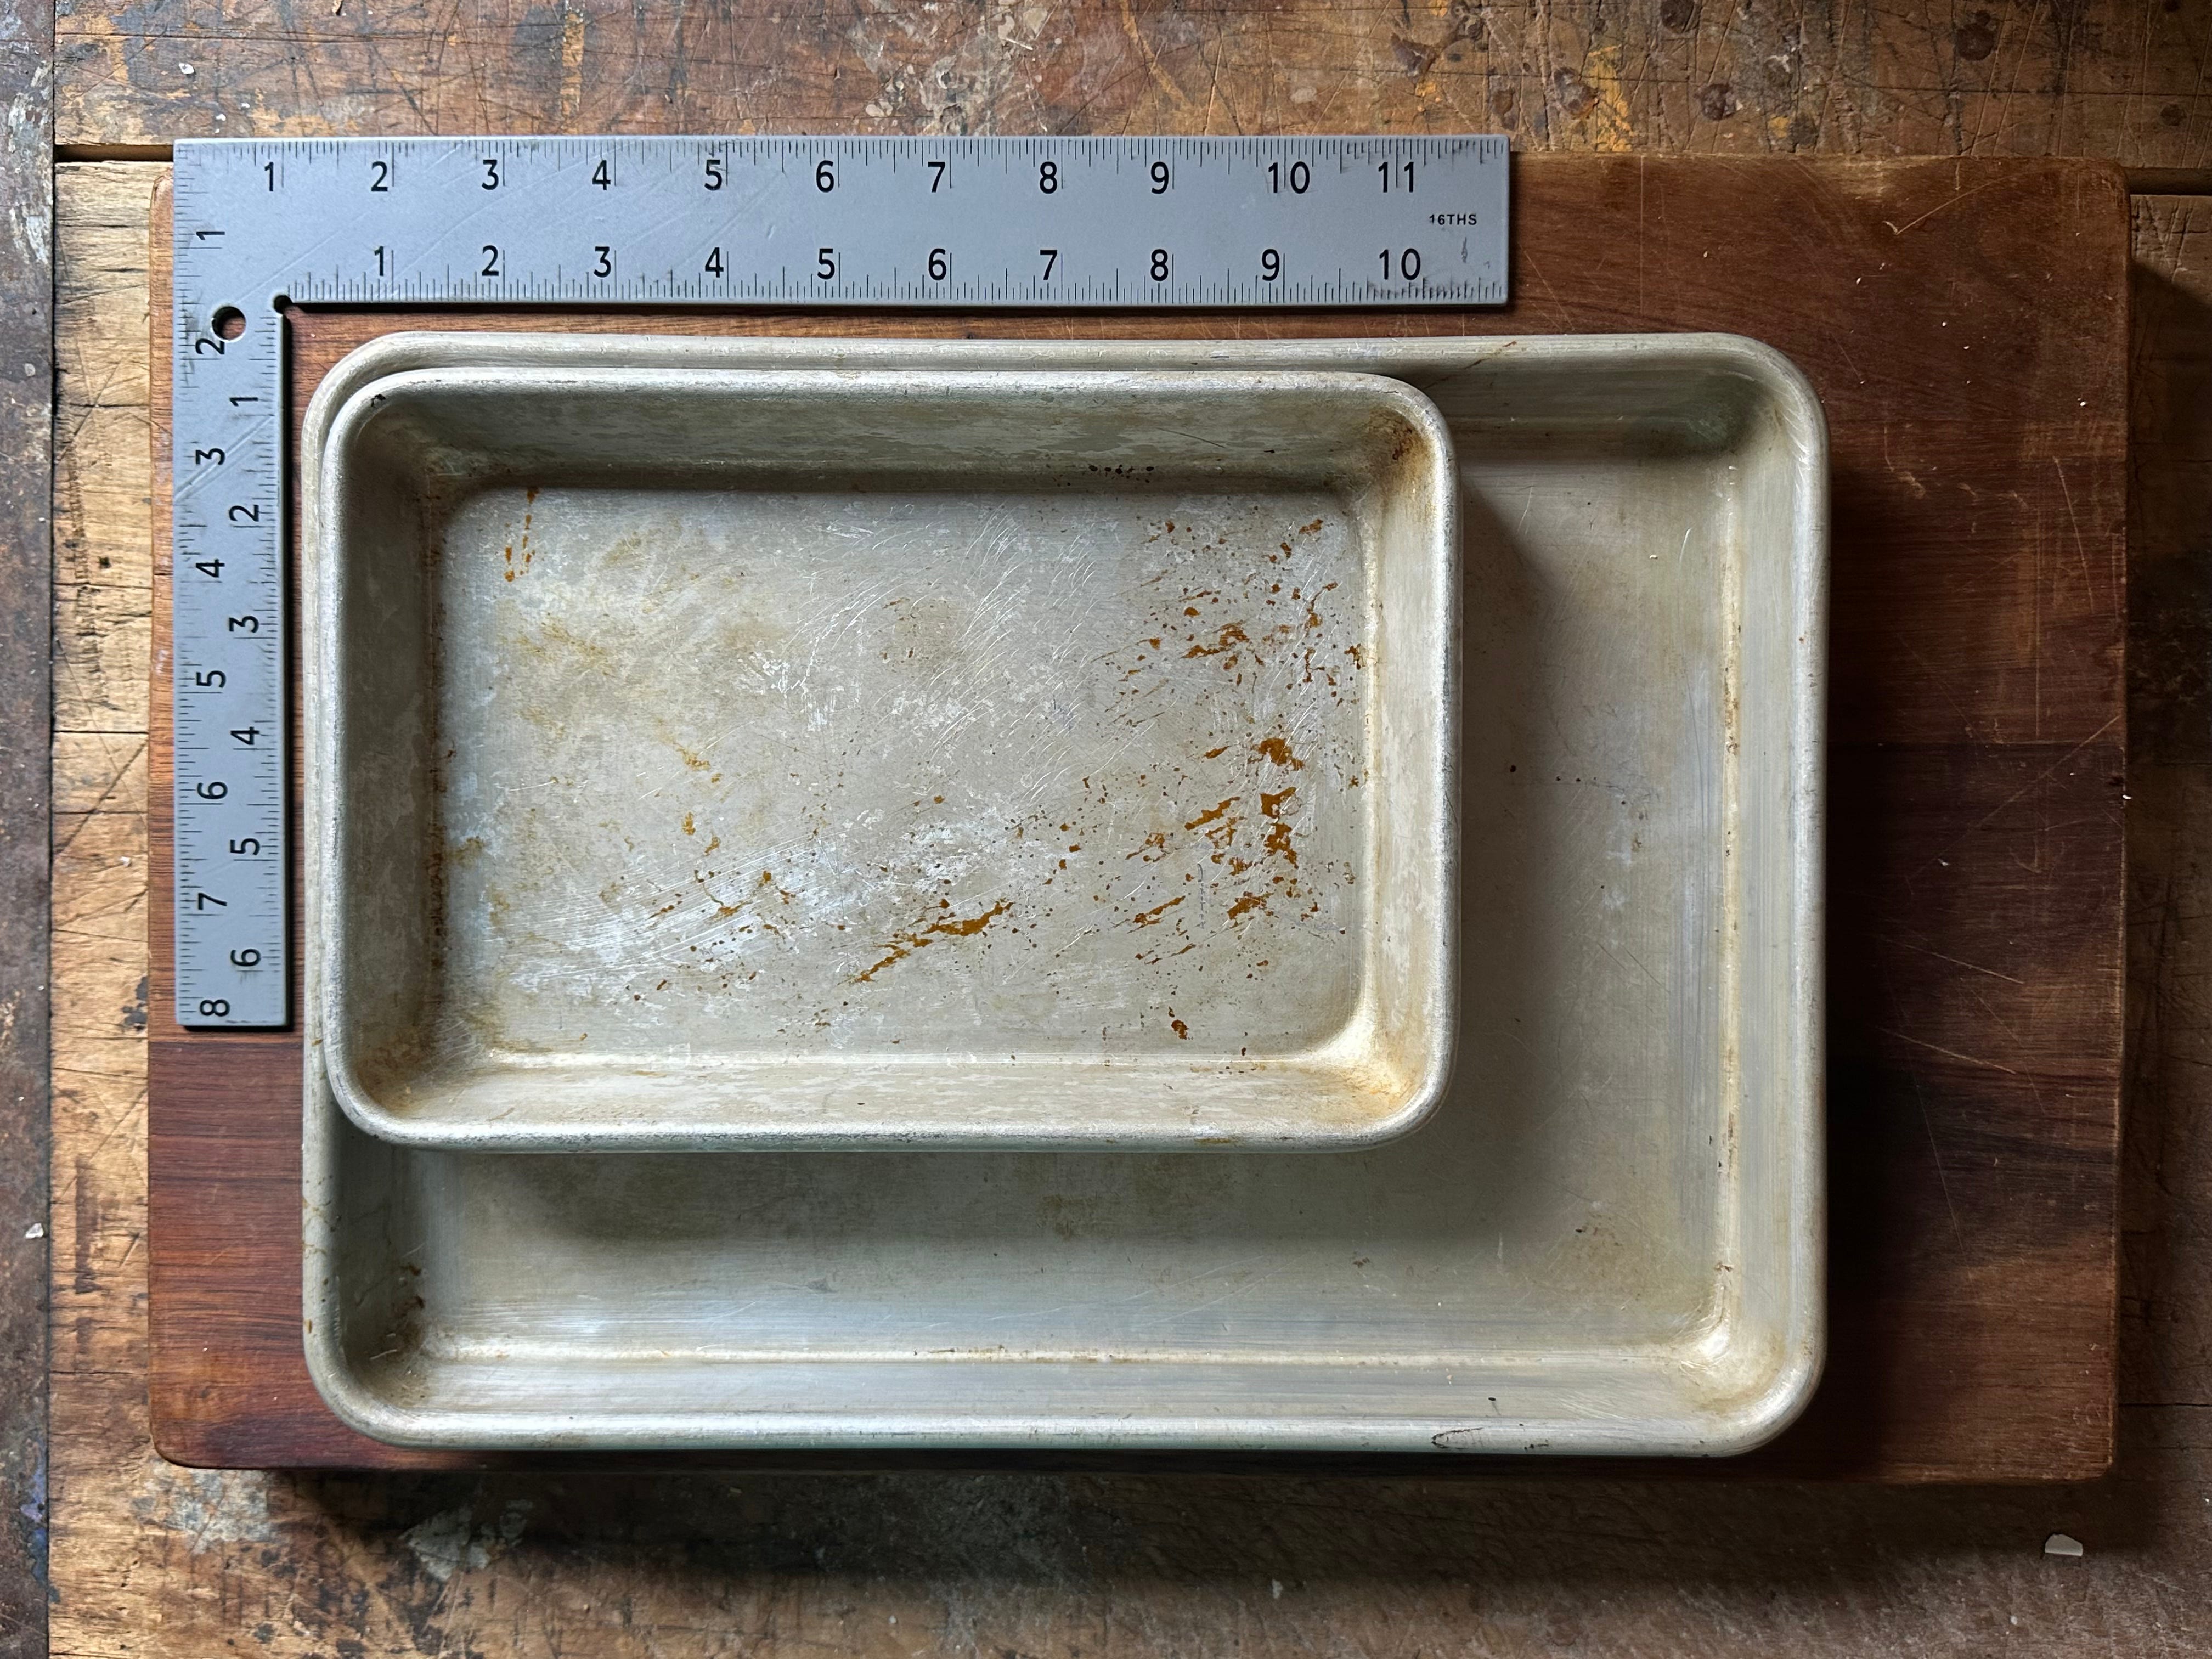
Eighth sheet tray - Usually only seen in fine dining kitchens, eighth sheet trays are perfect for toasting small quantities of nuts, seeds, or spices. Because of their small size, air circulates around them quite easily in the oven, resulting in fast toasting times. This size tray is also perfect for pre-weighing/measuring out ingredients. I love using one of these to lay out butter that needs to come to room temp.
Quarter sheet tray - Double the size of an eighth sheet tray but half the size of the standard US home baking tray. These trays can also be used to toast things for the same reasons as their miniature sibling but they also make great baking vessels. Sheet cake recipes can be divided in half to fit and most 9x13 brownies/bars will bake beautifully using this pan. When not in the oven, this pan makes a great stove-side caddie for bottles of oil/vinegars/sauces that you need waiting at the ready.
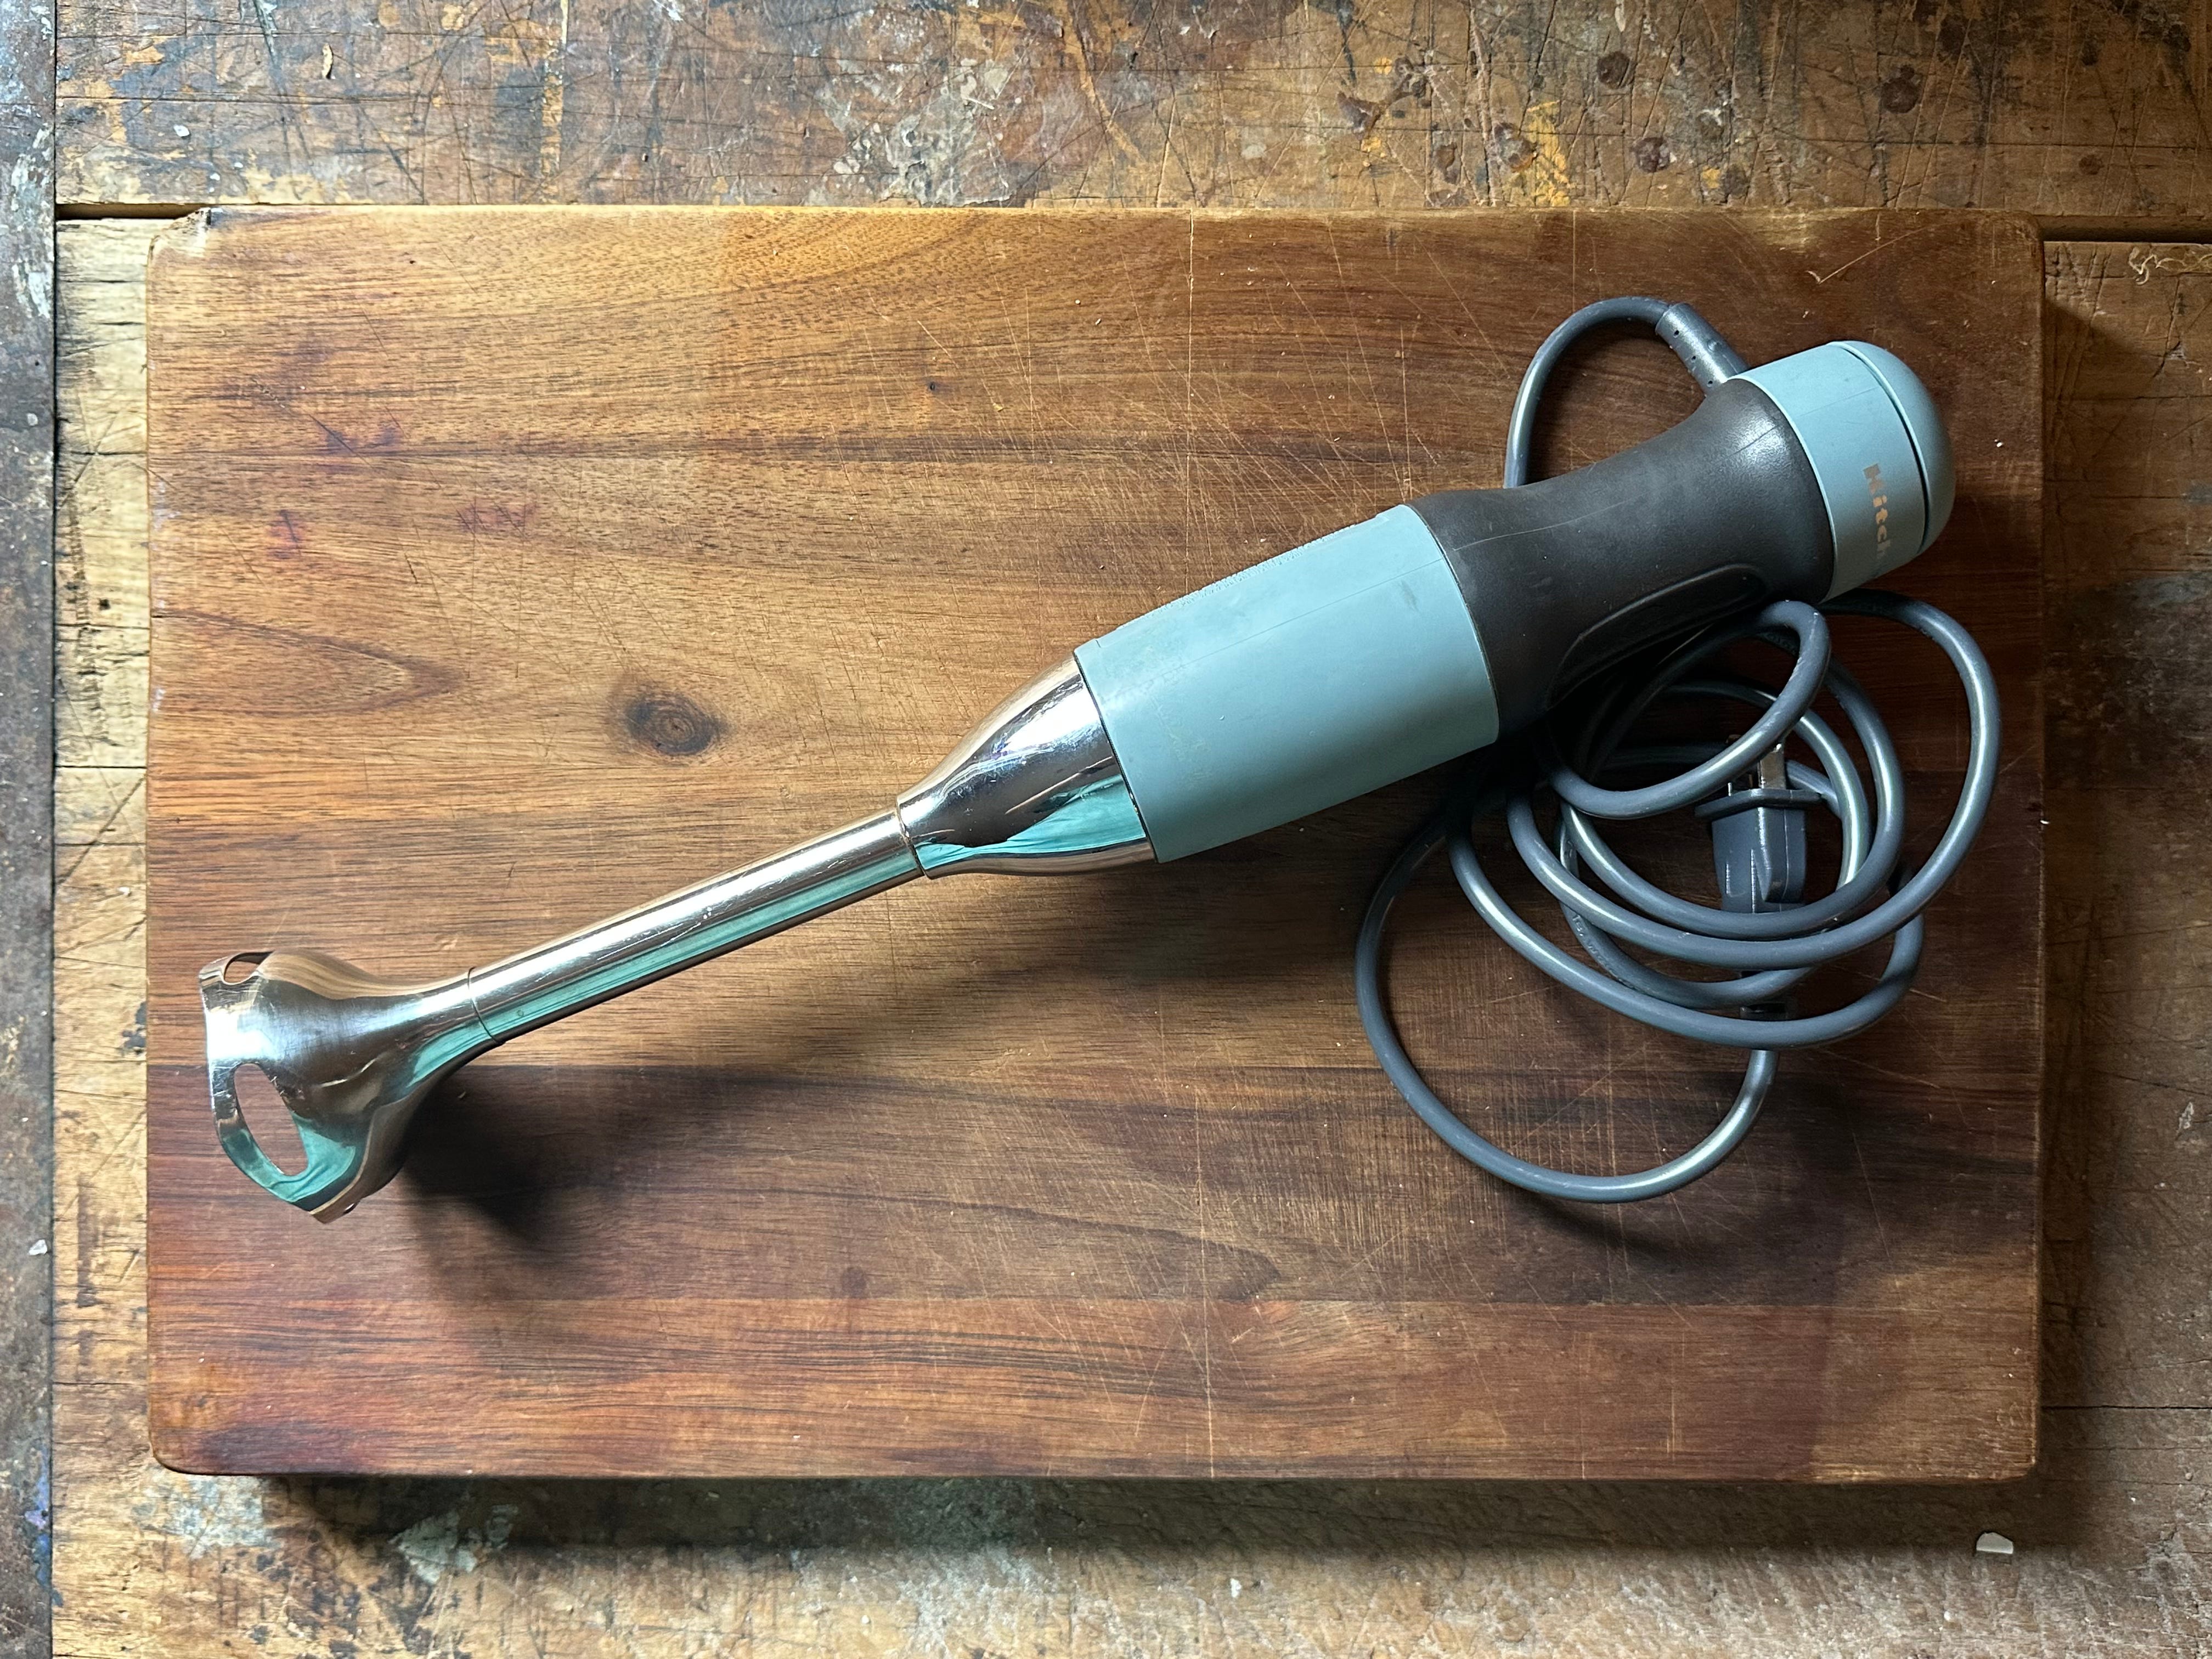
Immersion blender - When I bought this, I had no clue just how useful it would become in my pastry practice. For years it mostly sat in my drawer, relegated only to the task of pureeing soups. It wasn’t until I started baking more creatively that I realized how nice it is to have a compact way of breaking down and emulsifying things like fruits, custards, and batters into smooth pastes or chunky purees. Whereas a standard blender needs 3 to 4 inches of matter at the base (near the blades) to be effective, an immersion blender needs just 1/2 to 1 inch in the bottom of a narrow vessel before it can get to work. With a greater sense of control by easily lifting or repositioning the bladed end, it feels a little more hands on than just plopping things in a blender and hoping for the best when the goal is a very specific texture.
Today’s recipe is inspired by my love of a hearty porridge with plenty of toppings like dried fruit, nuts, and seeds. It’s also inspired by the banana oatmeal jumbo muffins at Pueblo Querido in Greenpoint, Brooklyn. Their muffin is soft and plush, made with quick cooking oats. I wanted my version to have a little more tooth. The old fashioned oats swell and soften while the batter sits and then bakes but each muffin still retains a nice bite. The little bit of espresso powder is a nod to the cafe’s cold brew, a jetfuel-like concoction that’s as delicious as their muffins, arepas, and pandebono.
A few notes…
If you don’t like cranberries you can use raisins, diced dried pineapple, or even diced dried apple chips to amp up the apple flavor.
The buttermilk helps to tenderize the oats while also adding flavor. If you don’t have buttermilk you can substitute regular milk with 1 tablespoon of apple cider vinegar. No need to let the milk and vinegar sit before mixing into the batter.
I use espresso powder like vanilla extract here. It’s not a primary flavor but it helps to add depth to the other ingredients in the muffins. You can substitute 1 teaspoon finely ground coffee if instant coffee isn’t available.
If you don’t have or like flaxseeds - try chia, sesame, hemp, or poppy seeds.
Apple Cranberry Baked Oatmeal Muffins
makes 6 jumbo muffins or 12 standard muffins
Keep reading with a 7-day free trial
Subscribe to Save Me A Slice to keep reading this post and get 7 days of free access to the full post archives.